Hôm nay, chúng ta sẽ cùng nhau khám phá cách tích hợp một trong những công cụ soạn thảo phổ biến và nổi tiếng nhất, đó là TinyMCE, vào trang web của bạn.

TinyMCE là gì?
TinyMCE là một trình soạn thảo HTML WYSIWYG tiên tiến, được tạo ra để giúp việc tạo nội dung trang web trở nên đơn giản hơn. Trình soạn thảo này rất phổ biến và được ứng dụng rộng rãi trong nhiều platform như WordPress, Medium, Evernote, và nhiều công cụ khác. TinyMCE thường được lựa chọn bởi các nhóm phát triển chuyên nghiệp nhờ vào tính linh hoạt và khả năng tùy chỉnh của nó.
Tích hợp TinyMCE vào Laravel
Một trang web tập trung vào nội dung thường cần một công cụ soạn thảo mạnh mẽ. Trong chuỗi bài viết hướng dẫn lập trình Laravel, blog sẽ hướng dẫn cách tích hợp công cụ soạn thảo TinyMCE vào Laravel với sử dụng Vite.
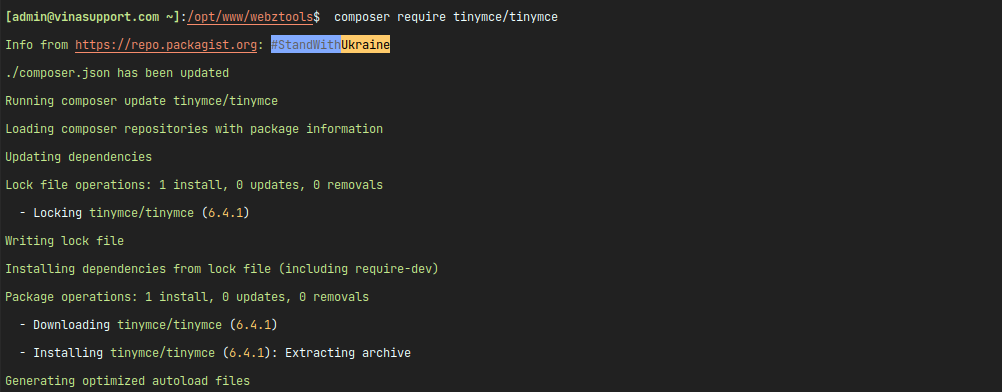
Bước 1: Thêm TinyMCE vào project bằng composer
composer require tinymce/tinymce

Bước 2: Tạo file tinymce-config.blade.php trong thư mục resources/views/admin/component/ của Laravel (Bạn có thể thay đổi theo đường dẫn project của bạn)
<script src="{{ Vite::asset('vendor/tinymce/tinymce/tinymce.min.js') }}" referrerpolicy="origin"></script>

<script>
    tinymce.init({
        selector: '.web-editor', // Replace this CSS selector to match the placeholder element for TinyMCE
        plugins: 'code table lists',
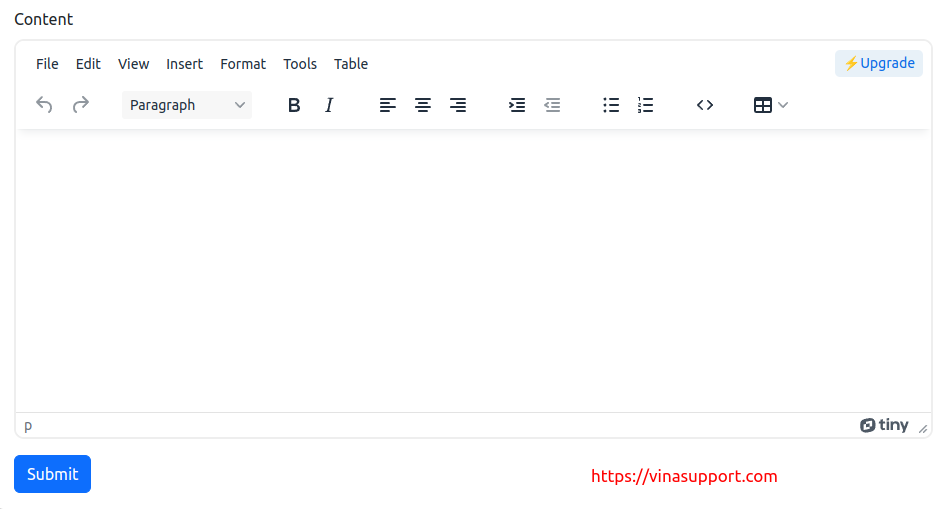
        toolbar: 'undo redo | blocks | bold italic | alignleft aligncenter alignright | indent outdent | bullist numlist | code | table'
    });
</script>
Bước 3: Đặt textarea có class là .web-editor ở bất kỳ chỗ nào trong project của bạn để hiển thị bộ soạn thảo.
<textarea class="form-control web-editor" id="input-content" rows="3"></textarea>
Bước 4: Chạy lệnh php artisan serve để khởi chạy web chúng ta sẽ có.

TinyMCE sử dụng Laravel Vite
Trường hợp bạn chạy server từ thư mục public thì bạn cài đặt plugin vite-plugin-static-copy để copy toàn bộ source tinymce ở thư mục vendor ra thư mục public
Cài đặt plugin vui lòng tham khảo hướng dẫn ở đây:
Sử file config vite.config.js với nội dung như sau:
import { defineConfig } from 'vite';
import laravel from 'laravel-vite-plugin';
import { viteStaticCopy } from 'vite-plugin-static-copy'

export default defineConfig({
    plugins: [
        laravel({
            input: [
                'resources/sass/app.scss',
                'resources/js/app.js',
            ],
            refresh: true,
        }),
        viteStaticCopy({
            targets: [
                {
                    src: 'vendor/tinymce/tinymce',
                    dest: '../js/'
                },
            ]
        })
    ],
});
Sau đó chạy lệnh vite build để copy file ra thư mục public

Trong file tinymce-config.blade.php sửa thành:
<script src="{{ asset('js/tinymce/tinymce.min.js') }}" referrerpolicy="origin"></script>
{{--<script src="{{ Vite::asset('vendor/tinymce/tinymce/tinymce.min.js') }}" referrerpolicy="origin"></script>--}}

<script>
    tinymce.init({
        selector: '.web-editor', // Replace this CSS selector to match the placeholder element for TinyMCE
        plugins: 'code table lists',
        toolbar: 'undo redo | blocks | bold italic | alignleft aligncenter alignright | indent outdent | bullist numlist | code | table'
    });
</script>


